プロジェクト管理をツールを検討すると、Redmineの名前はよく上がります。
同じようなサービスにBacklogやAsanaのようなツールがあります。
しかし、無償だけでは不十分だったり、機能を追加しようとすると維持費が割と高いのが悩ましい所です。
Redmineであれば、カスタマイズが出来ますし、管理さえ出来ればサーバー代だけで導入出来ます。
最近ではRedmineのテンプレートイメージを導入するだけで作れるサービスもあるので、より簡単に導入する事が出来るようになりました。
www.conoha.jp
しかし、
プラグインを導入したり、メール送信設定は管理画面から対応できません。
契約するホスティングサービスやミドルウェアの構成も決められていますので、状況に合わせたカスタマイズも難しいです。
さて、
今回は、土台となるRedmineの環境を一から実装するフローをついてまとめます。
クライアントPCについて
私の環境はMac (Mojave 10.14.4)ですので、Macで操作する事を前提にします。
今回の構成
なるべく最新の構成で構築します。
Redmine本体
現時点での安定版である、4.0.3を使用します。
ホスティングについて
ConoHaのVPSを使用します。
www.conoha.jp
VPSなのに従量課金制なので、失敗してもすぐ消せるのが気に入っています。
(実際はConoHaだけでないでしょうし、無料枠で使えるサービスもあるとは思いますが…)
サーバについて
| OS名 | バージョン |
|---|---|
| CentOS | 7.6.1810 |
ミドルウェアについて
WebサーバーはNginxで実装しますので、RubyのアプリケーションサーバーとしてUnicornを使用します。
構成は下記です。
| ソフト名 | バージョン | 概要 |
|---|---|---|
| Unicorn | 5.5.1 | Rubyのアプリケーションサーバーソフトウェアとして使用 |
| Nginx | 1.12.2-2.el7 | Webサーバーソフトウェア |
| MySQL | 8.0 | データベース |
| Ruby | 2.6.3 | Redmineを動かすための言語 |
Unicornについて雑感
UnicornはRack Webサーバーなので、Unicron単体でも動くかもしれません。
しかし、現実的にはNginxにWebサーバーの機能を持たせる事が多いようです。
ドメイン周り
ドメインは、redmin.example.comにします。
IPをそのまま使用するでも良いのですが、覚えずらいのでドメインを指定します。
ドメインは、お名前.comで購入したドメインを使います。
SSL証明書はLet's encliptで発行します。
構築手順について参考ページ
大枠は下記のドキュメンテーションを参考に構築しました。
サーバー準備
導入するサーバーを用意します。
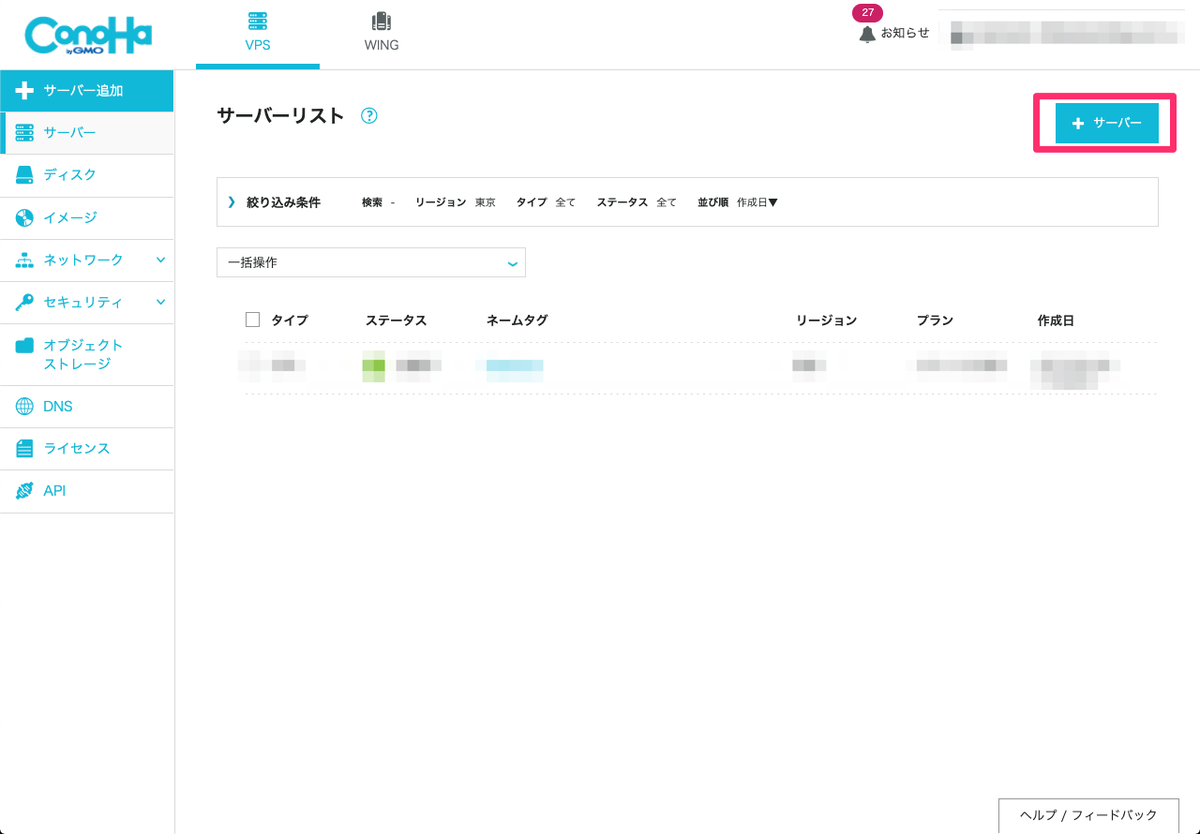
ConoHaの場合は、ログイン後ダッシュボードのサイドメニューから「サーバー」を選択します。
サーバー一覧が表示されますので、右上の「+サーバー」を選択します。
次に、追加するサーバーの設定を行います。
今回は最小構成で行いますので次のような構成にします。
| 設定項目 | 設定値 | 備考 |
|---|---|---|
| リージョン | 東京 | |
| サービス | 512MB(一番小さい構成) | |
| イメージタイプ | CentOS | 現時点ではバージョン7.6 |
| ネームタグ | Redmine | 任意ですが、わかりやすくするため |
※ rootパスワードは任意の値を設定してください。

設置後、「追加」ボタンが有効になりますので、選択するとサーバーが構築されます。
尚、ConoHaは従量課金制ですので、もし誤って作った場合でもすぐ消せば課金がほぼ発生しません。
構築後に確認する事
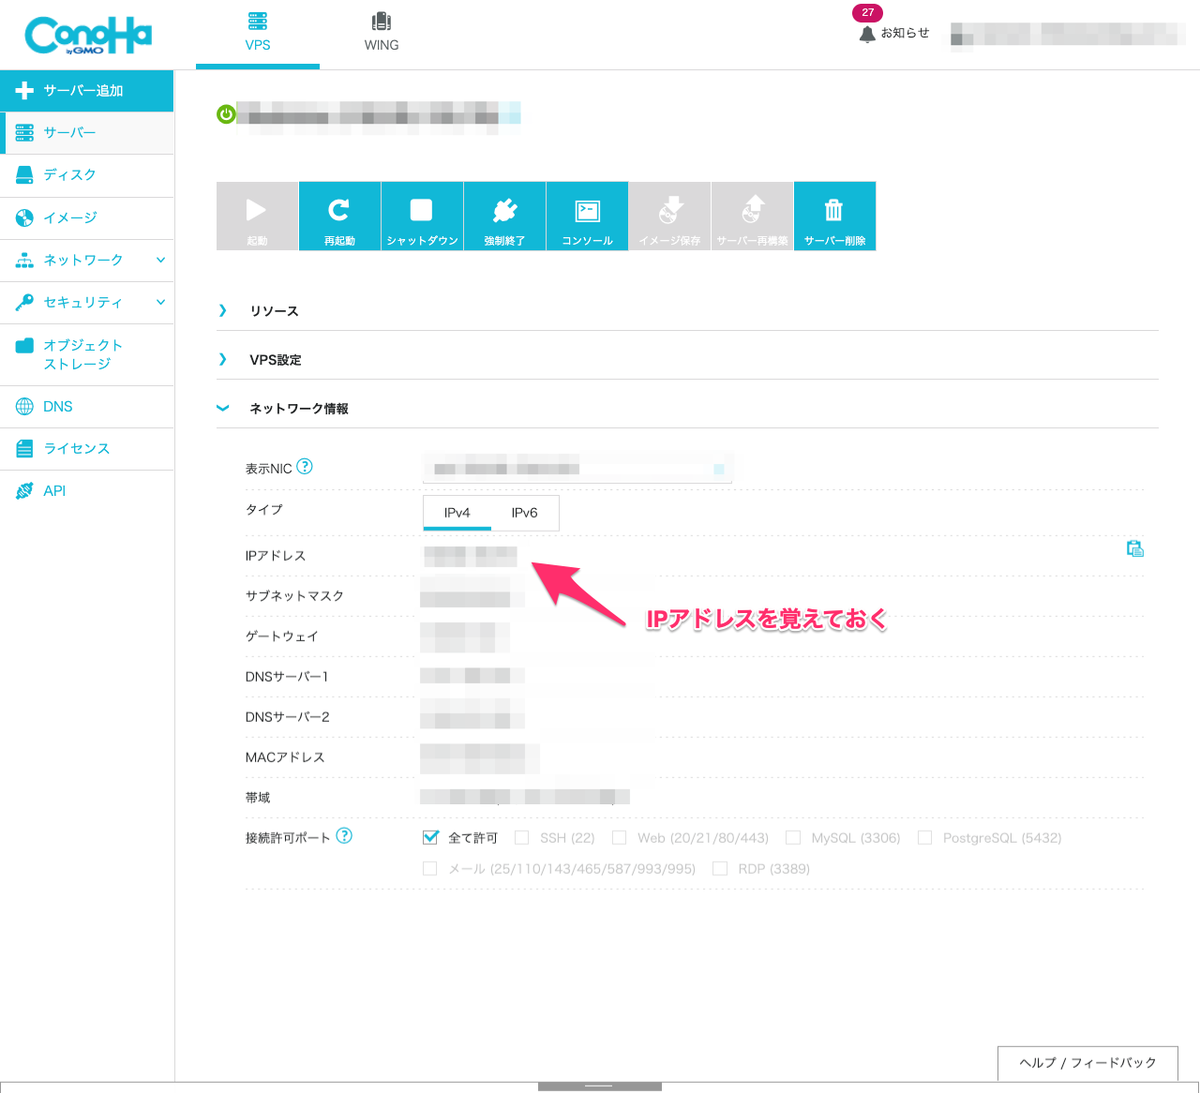
構築したサーバーの詳細ページから、ネットワーク接続->IPアドレスを確認します。
このIPが接続するサーバ情報です。
OS設定
次に、Linuxの設定をしていきます。
ここからは、コンソールでの作業になります。
この記事では便宜上、次のような構成にする設定で記載します。
| 項目 | 設定値 |
|---|---|
| サーバーのIP | 123.11.22.33 |
サーバにSSH接続
先ほど確認したIPと設定したrootパスワードを使用して接続します。
$ssh root@123.11.22.33
# パスワード入力を求められるのでrootパスワードを入力
SELinuxを無効にする
SELinuxを無効にします。
ただし、ConoHaの場合は既に設定済みのようです。
設定方法は省略しますが、設定については/etc/sysconfig/selinuxに記述されています。
確認する場合
無効になっているか確認する場合は、getenforceを実行します。
$ getenforce
Disabled
Firewallのhttpとhttpsのポートを開ける
デフォルトだと、インターネット経由で接続できません。
httpsでも接続する想定なので一緒にポートを解放します。
http
$ firewall-cmd --zone=public --add-service=http --permanent
$ firewall-cmd reload
https
$ firewall-cmd --zone=public --add-service=https --permanent
$ firewall-cmd reload
必要なパッケージのインストール
構築に必要なパッケージをインストールします。
この他にも、要所要所で必要なパッケージが出てきますので、都度説明します。
# 開発ツール(Cコンパイラ等)のインストール
$ yum -y groupinstall "Development Tools"

# Rubyに必要なデータをインストール
$ yum -y install openssl-devel readline-devel zlib-devel curl-devel libyaml-devel libffi-devel

# ImageMagickとヘッダファイル・日本語フォントのインストール
$ yum -y install ImageMagick ImageMagick-devel ipa-pgothic-fonts

# Ruby用のパッケージインストール
$ yum install -y openssl-devel readline-devel zlib-devel
Rubyインストール
RedmineはRubyで動きますので、Rubyを使えるようにします。
今回は、Rubyのバージョン管理ツールrbenvを用いてインストールします。
rbenvの導入は、下記を参考に進めます。
qiita.com
rbenvインストール
githubで公開されているリポジトリをcloneして導入します。
今回は、root直下にリポジトリを作成します。
$ cd
$ git clone https://github.com/rbenv/rbenv.git ~/.rbenv
$ echo 'export PATH="$HOME/.rbenv/bin:$PATH"' >> ~/.bash_profile
 ~/.rbenv/bin/rbenv init
# Load rbenv automatically by appending
# the following to ~/.bash_profile:

eval "$(rbenv init -)"

## bash_profileに追加
$ echo 'eval "$(rbenv init -)"' >> ~/.bash_profile
$ source ~/.bash_profile
パスを通したので、Rubyが動くようになります。
$ rbenv -v
ruby-buildインストール
$ git clone https://github.com/rbenv/ruby-build.git ~/.rbenv/plugins/ruby-build
$ ~/.rbenv/plugins/ruby-build/install.sh
$ rbenv install -l
## バージョン一覧表示
2.6.3
Rubyをインストール
現時点での安定版が2.6.3なので、このバージョンをインストールして、有効にします。
$ rbenv install 2.6.3
$ rbenv global 2.6.3
$ ruby -v
2.6.3
これで、Rubyが使えるようになりました。
MySQLインストール
データベースはMySQLを使用します。
パッケージのインストール
リポジトリ一覧から安定版のRPMファイルを確認して次のコマンドでインストールします。
$ yum localinstall -y https://dev.mysql.com/get/(リポジトリ名)
$ yum install -y mysql-community-server
$ mysqld --version
/usr/sbin/mysqld
Ver 8.0.16 for Linux on x86_64 (MySQL Community Server - GPL)

# Redmineの設定時に必要なパッケージ
$ yum install -y mysql-devel
MySQLの起動設定
$ service mysqld start
$ service mysqld status
Active: active (running) since Sat 2019-05-25 05:50:16 JST; 27s ago
MySQLの再起動設定
再起動時にMySQLを立ち上げるように設定します。
$ systemctl enable mysqld.service
MySQLにログインする
MySQLは動きましたので、rootアカウントでログインできます。
初期パスワードでログインしてみます。
# 初期パスワードの確認
$ grep 'temporary password' /var/log/mysqld.log
2019-05-24T20:50:11.112501Z 5 [Note] [MY-010454] [Server] A temporary password is generated for root@localhost: (パスワード)

$ mysql -u root -p
Enter password: (パスワード)
MySQLのセキュリティ設定
rootパスワードの設定と、その他設定をします。
設定中に質問をされますが、下記の内容なので特に理由がなければ全て許可します。
- リモートで接続を無効にして良いか?
- 匿名ログインの許可しないか?
- test用のデータベースを削除するか?
- 今までの設定を有効にするか?
$ mysql_secure_installation

Securing the MySQL server deployment.

Enter password for user root:

The existing password for the user account root has expired. Please set a new password.

New password:

Re-enter new password:
The 'validate_password' component is installed on the server.
The subsequent steps will run with the existing configuration
of the component.
Using existing password for root.

Estimated strength of the password: 100
Change the password for root ? ((Press y|Y for Yes, any other key for No) : y

New password:

Re-enter new password:

Estimated strength of the password: 100
Do you wish to continue with the password provided?(Press y|Y for Yes, any other key for No) : y
By default, a MySQL installation has an anonymous user,
allowing anyone to log into MySQL without having to have
a user account created for them. This is intended only for
testing, and to make the installation go a bit smoother.
You should remove them before moving into a production
environment.

Remove anonymous users? (Press y|Y for Yes, any other key for No) : y
Success.


Normally, root should only be allowed to connect from
'localhost'. This ensures that someone cannot guess at
the root password from the network.

Disallow root login remotely? (Press y|Y for Yes, any other key for No) : y
Success.

By default, MySQL comes with a database named 'test' that
anyone can access. This is also intended only for testing,
and should be removed before moving into a production
environment.


Remove test database and access to it? (Press y|Y for Yes, any other key for No) : y
 - Dropping test database...
Success.

 - Removing privileges on test database...
Success.

Reloading the privilege tables will ensure that all changes
made so far will take effect immediately.

Reload privilege tables now? (Press y|Y for Yes, any other key for No) : y
Success.

All done!
MySQLのconfファイル修正
MySQLで扱う文字コードや、認証方式について設定をします。
設定ファイルは、/etc/my.confにあります。
設定内容は下記です。
この設定では、必須設定以外にも、MySQLをコンソール上で扱いやすくするための設定も行なっています。
[mysqld]
datadir=/var/lib/mysql
socket=/var/lib/mysql/mysql.sock

log-error=/var/log/mysqld.log
pid-file=/var/run/mysqld/mysqld.pid

# 文字コードをUTF-8に設定
character-set-server = utf8

# 認証方法をハッシュ化じゃなくても良いので今まで通りの方式に設定
default-authentication-plugin=mysql_native_password

[mysql]

# 文字コードをUTF-8に設定
default-character-set = utf8

[client]
host=localhost
port=3306
user=root
password=(パスワード)
prompt=mysql (\\u@\\h) [\\d]>\\_     # CUI上の表示調整用

[mysqldump]
user=root
password=(パスワード)
参考ページ
Redmine用のテーブルとアカウント追加
Redmine用のデータベースと作業用アカウントを作ります。
設定内容は下記です。
| 設定項目 | 設定値 |
|---|---|
| DB名 | redmine |
| 作業アカウント | redmine_admin |
| ユーザーパスワード | password |
テーブル作成
mysql> CREATE DATABASE redmine charset="utf8";
アカウント作成
mysql> CREATE USER 'redmine_admin'@'localhost' IDENTIFIED WITH mysql_native_password BY 'password';
mysql> CREATE USER 'redmine_admin'@'%' IDENTIFIED WITH mysql_native_password BY 'password';
mysql> GRANT ALL PRIVILEGES ON redmine.* TO 'redmine_admin'@'localhost' WITH GRANT OPTION;
mysql> GRANT ALL PRIVILEGES ON redmine.* TO 'redmine_admin'@'%' WITH GRANT OPTION;
Redmineをインストール
Redmine本体を導入します。
本体をダウンロード
redmineはsubversionで管理しているようなので、svnコマンドを使います。
ブランチは、最新の安定版を取ってくるので4.0-stableと指定します。
$ svn co https://svn.redmine.org/redmine/branches/4.0-stable/var/lib/redmine
(R)eject, accept (t)emporarily or accept (p)ermanently? t # 一時的に許可
実行すると、/var/lib/配下にredmineディレクトリが作られます。
これが、Redmineのディレクトリになります。
データベースの設定ファイル作成
MySQLでRedmineのデータを扱えるようにするために、設定を作成します。
テンプレート用に、exampleというファイルがありますので、今回の設定用に複製してリネームします。
$ cd /var/lib/redmine/config/
$ cp database.yml.example database.yml
追加した、database.ymlに下記の設定を追加します。
production:
  adapter: mysql2           #mysqlなのでそのまま
  database: redmine
  host: localhost
  username: redmine_admin
  password: "password"
  encoding: utf8
Rubyのパッケージをインストール
Redmineのディレクトリ内にあるvenderファイルを元にパッケージをインストールします。
インストールするのは、Rubyのパッケージですボデbundleコマンドより実行します。
$ cd /var/lib/redmine

# Redmineで必要なモジュールをインストールする
$ bundle install --without development test
セッションデータ暗号化
デフォルトのRedmineはセキュリティ対策をしていないので、下記で暗号化の設定をします。
$ bundle exec rake generate_secret_token
データベースのマイグレート
先ほど設定したMySQLの設定を元に、データベースの初期構築を行います。
$ bundle exec rake db:migrate RAILS_ENV=production
初期データ投入
任意ですが、初期データの投入をすることもできます
$ RAILS_ENV=production REDMINE_LANG=ja bundle exec rake redmine:load_default_data
Unicornのインストール
RubyをWebで動かすために必要なUnicornを導入します。
Gemfileを追加
デフォルトでは、Unicornを導入するためのGemfileが設定されていませんので、新しく追加します。
既存のGemfileに追加せず、Gemfile.localを作って追加していきます。
$ cd /var/lib/redmine
$ touch Gemfile.local
追加した、Gemfile.localの中身は下記です。
gem "unicorn"
Unicornをインストール
追加したGemfileを元に、Unicronをインストールします。
$ cd /var/lib/redmine
$ bundle update
Unicornの起動用のUnitを追加
Unicornはデータベースに接続できないと停止するとのことなので、 接続できるようにカスタマイズしたUnitを追加します。
$ touch /usr/lib/systemd/system/redmine-unicorn.service
Unit内訳は下記です。
設定ないのディレクトリはRubyのインストール方法によって異なるので、環境ごとに変えてください。
[Unit]
Description=Redmine Unicorn Server
After=mysqld.service

[Service]
WorkingDirectory=/var/lib/redmine
Environment=RAILS_ENV=production
SyslogIdentifier=redmine-unicorn
PIDFile=/var/lib/redmine/tmp/pids/unicorn.pid

# root直下にrbenvディレクトリを作っているので、そこにパスを通します。
ExecStart= /root/.rbenv/shims/bundle exec "unicorn_rails -c config/unicorn.rb -E production"
ExecStop=/usr/bin/kill -QUIT $MAINPID
ExecReload=/bin/kill -USR2 $MAINPID

[Install]
WantedBy=multi-user.target
Unicornの設定ファイル追加
Unitのコンフィグに書いていた、config/unicorn.rbも追加します。
$ touch /var/lib/redmine/config/unicorn.rb
追加したunicron.rbファイルは下記です。
socket名は、unicorn_redmine.sockにしています。
worker_processes 2

app_path = "/var/lib/redmine"


listen  File.expand_path('tmp/unicorn_redmine.sock', app_path)
pid File.expand_path('tmp/unicorn.pid', app_path)
stderr_path File.expand_path('log/unicorn.stderr.log', app_path)
stdout_path File.expand_path('log/unicorn.stdout.log', app_path)

preload_app true

timeout 30

if GC.respond_to?(:copy_on_write_friendly=)
  GC.copy_on_write_friendly = true
end

before_fork do |server, worker|
  defined?(ActiveRecord::Base) and ActiveRecord::Base.connection.disconnect!

  old_pid = "#{server.config[:pid]}.oldbin"
  if old_pid != server.pid
    begin
      sig = (worker.nr + 1) >= server.worker_processes ? :QUIT : :TTOU
      Process.kill(sig, File.read(old_pid).to_i)
    rescue Errno::ENOENT, Errno::ESRCH
    end
  end
end

after_fork do |server, worker|
  defined?(ActiveRecord::Base) and ActiveRecord::Base.establish_connection
end
参考ページ
今回設定した、Rubyの設定方法は冒頭でご共有したリンクの設定方法をベースにしています。
Rubyの設定した内容について読み解く場合、下記が参考になりました。
Unicorn起動
$ service redmine-unicorn start
$ service redmine-unicorn status
Active: active (running) since Sat 2019-05-25 18:49:04 JST; 1min 2s ago
Unicronサーバー自動起動設定
$ systemctl enable redmine-unicorn.service
Nginxのインストール
Webサーバー用にNginxを導入します。
導入方法は、次のドキュメントを参考にします。
Nginxのリポジトリ追加
$ yum install -y yum-utils
$ touch /etc/yum.repos.d/nginx.repo
安定板をインストールしますので、追加したnginx.repoに次の設定を追加します。
[nginx]
name=nginx stable repo
baseurl=http://nginx.org/packages/centos/$releasever/$basearch/
gpgcheck=1
enabled=1
gpgkey=https://nginx.org/keys/nginx_signing.key
Nginxをインストール
追加したリポジトリを元にパッケージをインストールします。
$ yum install -y nginx
Nginxの設定
http経由でアクセスできるように、Nginxの設定を作成します。
$ touch /etc/nginx/conf.d/redmine.conf
追加した、redmine.confの内容は下記です。
upstream unicorn-redmine {
  server unix:/var/lib/redmine/tmp/unicorn_redmine.sock;
}

server {
  listen 80;
  server_name 123.11.22.33;

  root /opt/redmine/public;
  client_max_body_size 1G;

  location / {
    try_files $uri/index.html $uri.html $uri @app;
  }

  location @app {
    proxy_redirect off;
    proxy_set_header X-Real-IP $remote_addr;
    proxy_set_header X-Forwarded-For $proxy_add_x_forwarded_for;
    proxy_set_header Host $http_host;
    proxy_connect_timeout 60;
    proxy_read_timeout 60;
    proxy_send_timeout 600;
    proxy_pass http://unicorn-redmine;
  }

  error_page 500 502 503 504 /500.html;
}
syntax確認
$ nginx -t
nginx: the configuration file /etc/nginx/nginx.conf syntax is ok
nginx: configuration file /etc/nginx/nginx.conf test is successful
Upstreamの設定について雑感
Nginxはロードバランサーを設定することができます。 よく見る使い方は、サーバーのIPを設定して、アクセスの良に応じて振り分けるような使い方をします。
Unicornと組み合わせる場合は、sockファイルにパスを通す使い方が一般的なようです。
参考
qiita.com takuya-1st.hatenablog.jp
Nginxの起動
設定ができたので、nginxを起動します。
$ service nginx start
$ service nginx status
Active: active (running) since Sat 2019-05-25 22:13:27 JST; 6min ago
再起動設定
$ systemctl enable redmine-unicorn.service
http接続で確認
以上でwebサーバーに接続できるようになります。
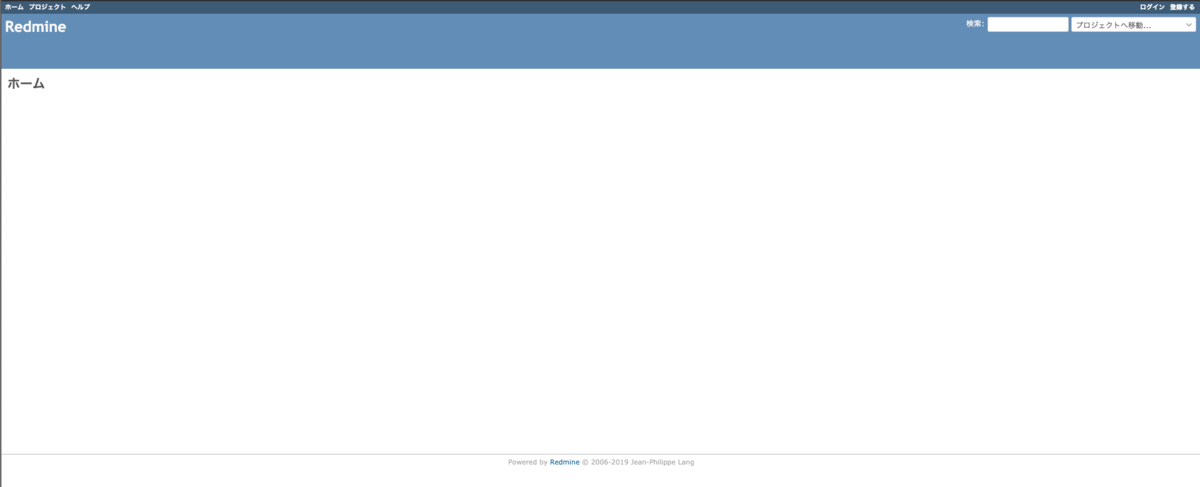
ブラウザから、http://123.11.22.33にアクセスすれば表示できるようになりました。
ドメインの設定
冒頭でも書きましたが、ドメインを指定してアクセスできるようにします。
なお、ドメインの購入は割愛します。
お名前.com側の設定
お名前.comにログイン後、ドメイン設定を選択します。
サイドメニューの「ネームサーバーの設定」->「DNS関連機能の設定」を選択すると、ドメインが一覧で表示されます。
対象のドメインを選択して「次へ」を選択します。

ドメインの詳細画面に遷移しますので、「DNSレコード設定を利用する」の横にある「設定する」ボタンを選択します。

「DNSレコード設定」ページに移動すると、ドメインで設定しているレコード一覧が表示されます。
ページ中程にある、「入力」からレコードを追加します。
設定内容は下記です。
| 項目 | 設定値 |
|---|---|
| ホスト名 | redmine |
| Type | A |
| VALUE | 123.11.22.33 |
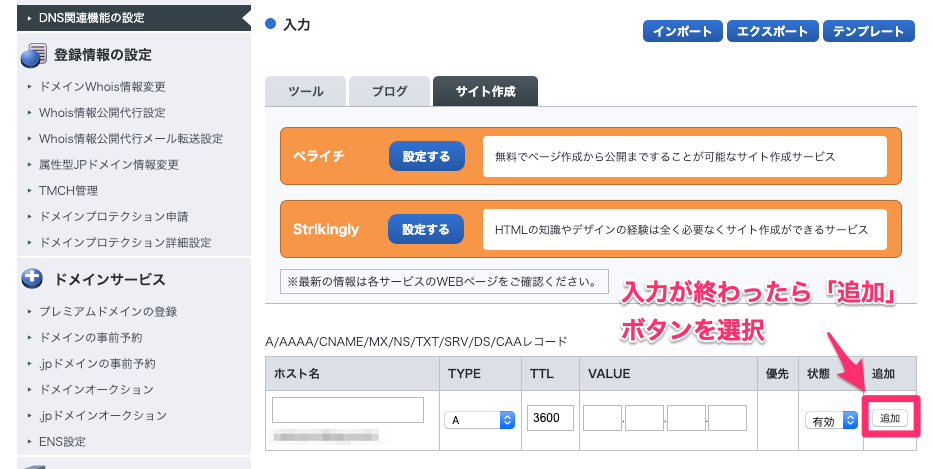
設定後、ページ下にある「確認画面へ進む」ボタンを選択します。
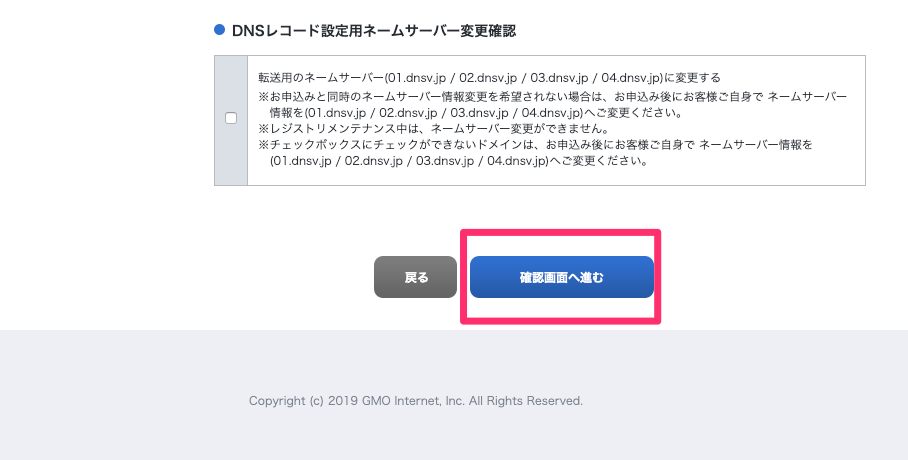
「DNSレコード設定」確認画面に遷移しますので、問題なければ「設定する」ボタンを押します。

これで設定は終わりです。
しばらくすると設定が適用されます。
再度、「DNSレコード設定」ページで設定された内容が確認できます。
ConoHa側の設定
サーバーの設定画面から、「VPS設定」->「PTRレコード」に移動します。
IPv4の逆引きホスト名に、お名前.comで設定したドメインを追加します。
右の鉛筆ボタンを押せば編集できるようになります。

ConoHa側の設定は特にボタンがないので、変更すれば反映されます。
Nginxにドメインを適用
前項ではNginxのドメインにIP指定していました。
ドメインの設定が終わりましたので、IPからドメイン名に差し替えます。
redmine.confの、server_nameの部分を変更します。
server {
  server_name redmin.example.com;
変更後、Nginxを再起動して反映します。
$ service nginx restart
DNSが浸透していれば、http://redmin.example.comすぐドメインで見れるようになっていると思われます。
SSL証明書の設定
httpだと、扱いずらい情報もあるのでhttpsに対応できるようにします。
SSL証明書については、冒頭でも述べましたがLet's Encliptを使用します。
certbotのインストール
Let' Encliptの証明書の発行や更新は、certbotを使用します。
導入方法については次のページを参考に進めていきます。
webサーバーを止める
webサーバーが動いていると、証明書発行ができません。
事前にサーバーを止めておきます。
$ service nginx stop
Certbotをインストール
Certbotをインストールします。
Gitのリポジトリをcloneして、インストールを実行します。
途中、質問される箇所がありますが、発行するドメイン、連絡先のメールアドレス入力、サービスの同意に関する確認です。
内容を確認して許可してください。
尚、下記に記述する
./certbot-auto certonly --standalone -tの結果は、成功した時のものではありません。
結果文言を撮り忘れてしまいました。
成功した場合は、最後に作成した旨のメッセージが表示されます。
ご了承ください。
$ cd /usr/local/
$ git clone https://github.com/certbot/certbot
$ cd certbot
$ ./certbot-auto certonly --standalone -t

# 省略.
Creating virtual environment...
Installing Python packages...
Installation succeeded.
Saving debug log to /var/log/letsencrypt/letsencrypt.log
Plugins selected: Authenticator standalone, Installer None
Enter email address (used for urgent renewal and security notices) (Enter 'c' to
cancel): <メールアドレス>

- - - - - - - - - - - - - - - - - - - - - - - - - - - - - - - - - - - - - - - -
Please read the Terms of Service at
https://letsencrypt.org/documents/LE-SA-v1.2-November-15-2017.pdf. You must
agree in order to register with the ACME server at
https://acme-v02.api.letsencrypt.org/directory
- - - - - - - - - - - - - - - - - - - - - - - - - - - - - - - - - - - - - - - -
(A)gree/(C)ancel: A

- - - - - - - - - - - - - - - - - - - - - - - - - - - - - - - - - - - - - - - -
Would you be willing to share your email address with the Electronic Frontier
Foundation, a founding partner of the Let's Encrypt project and the non-profit
organization that develops Certbot? We'd like to send you email about our work
encrypting the web, EFF news, campaigns, and ways to support digital freedom.
- - - - - - - - - - - - - - - - - - - - - - - - - - - - - - - - - - - - - - - -
(Y)es/(N)o: Y
Please enter in your domain name(s) (comma and/or space separated)  (Enter 'c'
to cancel): redmin.example.com <--ドメイン名を入力
Obtaining a new certificate
Performing the following challenges:
http-01 challenge for redmin.example.com
Cleaning up challenges
Problem binding to port 80: Could not bind to IPv4 or IPv6.
正しく作られていれば、/etc/letsencrypt/というディレクトリ配下に、liveと言うディレクトリが出来ます。
その配下に、証明書を作成したドメインのディレクトリが作成されており、証明書ファイルが格納されています。
Nginxの設定を変える
httpsの場合は、443ポートで接続します。
Nginxの設定ファイルに、httpsポートの場合の処理を追加します。
基本的には、httpで設定した内容を、httpsにそのまま差し替えます。
また、httpsを強制的に表示させたいので、httpでアクセスしたら、httpsポートにリロードする設定を追加します。
upstream unicorn-redmine {
  server unix:/var/lib/redmine/tmp/unicorn_redmine.sock;
}

server {
  listen 80;
  server_name redmin.example.com;
  return 301 https://$host$request_uri;
}

server {
  listen 443 ssl;
  server_name redmin.example.com;

  # certbotで作成した証明書のパスを追加
  ssl_certificate /etc/letsencrypt/live/redmin.example.com/fullchain.pem;
  ssl_certificate_key /etc/letsencrypt/live/redmin.example.com/privkey.pem;

  ssl_prefer_server_ciphers on;
  ssl_protocols TLSv1 TLSv1.1 TLSv1.2;
  ssl_ciphers HIGH:!aNULL:!MD5;

  root /opt/redmine/public;
  client_max_body_size 1G;

  location / {
    try_files $uri/index.html $uri.html $uri @app;
  }

  location @app {
    proxy_redirect off;
    proxy_set_header X-Real-IP $remote_addr;
    proxy_set_header X-Forwarded-For $proxy_add_x_forwarded_for;
    proxy_set_header Host $http_host;
    proxy_connect_timeout 60;
    proxy_read_timeout 60;
    proxy_send_timeout 600;
    proxy_pass http://unicorn-redmine;
  }

  error_page 500 502 503 504 /500.html;
}
httpsでアクセス
これで、https://redmine.example.comでアクセス出来るようになりました。
ブラウザでアクセスすると表示されるかと思います。
また、httpでアクセスすると、自動的にhttpsにリロードされるようになっているかと思います。

Certbotの自動化
Let's Encliptの証明書は、90日ごとに更新する必要があります。
そのため、定期的にサーバに接続して次のコマンドを実行する必要があります。
$ /usr/local/certbot/ceertbot-auto renew
短期であれば良いですが、長期で使う場合は毎回実行するのは面倒です。
そのため、cronに設定して自動更新するように調整します。
cron用のスクリプト追加
cronに更新用のスクリプトを追加します。
追加する場合は、crontab -eで直接追加してもいいのですが、管理しやすくするためにcron.dディレクトリにシェルファイルを置いて実行できるようにします。
$ touch /etc/cron.d/certbot_renew_auto.sh
cron.dに設置した、certbot_renew_auto.shの内容は下記です。
# 例 毎月1日の4時に実行します。
0 4 1 * * /usr/local/certbot/certbot-auto renew && service reload nginx
これで、SSL証明書の自動更新できるようになります。
Linuxの作業アカウント作成
rootアカウントは何でもできてしまうので、rootアカウントは基本的に運用で使うものではありません。 (今更ですが…)本来は、作業アカウント必要に応じて管理者権限を使うべきです。
そのため、Linuxの作業アカウントを追加して、それから設定を実行できるようにします。
尚、アカウントを作成するにあたって次のような設定で記述します。
| 項目 | 設定値 | 備考 |
|---|---|---|
| 作業アカウントID | admin | |
| SSHポート | 2200 | デフォルトのポートは22ですが、2200で接続できるようにする |
| クライアントの公開鍵 | id_rsa.pub | .sshディレクトリ直下に鍵を作成 |
| サーバーのIP | 123.11.22.33 |
作業アカウント追加
SSHでサーバーに接続します。
接続後、下記のようにadminアカウントを作成します。
$ adduser admin
$ passwd admin
ユーザー admin のパスワードを変更。
新しいパスワード:  (password)
新しいパスワードを再入力してください:  (password)
sudo設定
sudoを実行できるように権限を付与します。
権限を付与する場合は、wheelグループに作ったユーザーを付与します。
$ usermod -G wheel admin
この後、wheelグループがsudoを使用できる設定にする必要があります。
しかし、ConoHaの場合は既に設定済みですので、visudoの設定は省略します。
認証方式の変更
この状態で、クライアントPCからSSH接続する事は可能です。
$ ssh admin@123.11.22.33
しかし、パスワードの場合、流出してしまう可能性もありますし、毎回パスワードを入力するのは手間でもあります。
そのため、鍵交換方式でSSH接続できるように調整します。
公開鍵を作成
クライアントPCで、SSH公開鍵を作成して、鍵の文字列をコピーします。
公開鍵ファイルは、./ssh/id_rsa.pubにして説明しますが、変えたい場合は任意で変えてください。
$ cd .ssh
$ ssh-keygen -t rsa -b 4096
$ cat id_rsa.pub | pbcopy
実行後、.sshディレクトリ配下に、id_rsa.pubとid_rsaというファイルが生成されます。
このうち、pubとついたファイルは公開鍵ですのでこれをサーバーに渡します。
サーバー側でSSHが使えるように設定
作成した公開鍵をscpコマンドで渡します。
$ scp ~/.ssh/id_rsa.pub admin@123.11.22.33:.
その後、adminでssh接続します。
初期状態では.sshディレクトリが用意されておらず、公開鍵を登録するauthorized_keysファイルも作成されていません。
そのため、追加できるように準備をします。
$ mkdir .ssh
$ chmod 700 .ssh
$ cat id_rsa.pub > .ssh/authorized_keys
$ chmod 600 .ssh/authorized_keys
$ rm -f id_rsa.pub
SSH接続の設定
公開鍵を使う設定と、パスワード認証を禁止にする設定を追加します。
設定ファイルは、/etc/ssh/sshd_configにあります。
必要であれば、バックアップを取り次のように修正します。
修正内容は下記のように変えます。
# 接続するポート番号を変える
### Port 22
Port 2200

# rootでのログインを無効にする
### PermitRootLogin yes
PermitRootLogin no

# パスワード認証を無効にする
### PasswordAuthentication yes
PasswordAuthentication no

# 公開鍵による接続を有効にする
PubkeyAuthentication yes
上記設定後にパスワード認証する
ConoHaの管理画面からであれば、直接コンソールにつなげます。
その際は、パスワードでログインできます。
ConoHaの管理画面からサーバの詳細ページに移動し、コンソールを選択します。

SSHの設定更新
SSHの設定内容を適用するために、sshdを再起動します。
$ service sshd restart
CentOS 7より前の場合
CentOS7から、LinuxのUnitを実行する方法が変わったようです。
前のバージョンは下記の方法で実行できます。
$ etc/rc.d/init.d/sshd restart
firewallのPort設定を変更する
SSHの接続ポートを22から2200に変えたので、Firewallの設定も変えます。
現状確認
そもそも、Firewall自体が有効になっている事と、どのPortが開いているか確認します。
$ systemctl status firewalld
   Active: active (running) since 金 2019-05-24 17:56:25 JST; 9h ago
$ firewall-cmd --list-all
public (active)
  target: default
  icmp-block-inversion: no
  interfaces: eth0
  sources:
  services: dhcpv6-client ssh http https
  ports:
  protocols:
  masquerade: no
  forward-ports:
  source-ports:
  icmp-blocks:
  rich rules:
既存のSSHの設定を削除
現状の場合は、SSHポートは22なので接続情報を削除します
$ firewall-cmd --permanent --remove-service=ssh
現行の設定値を確認する方法
参考までに、現状の設定については、/usr/lib/firewalld/services/ssh.xmlに記載されています。
$ cat /usr/lib/firewalld/services/ssh.xml
#省略
<port protocol="tcp" port="22"/>
新しいSSHの設定を追加
新しく設定したいポート番号2200用に設定ファイルを作成して、その設定をsshとして読み込むようにします。
FirewallにSSHを設定する設定内容については、/usr/lib/firewalld/services/ssh.xmlを流用します。
そのため、下記の手順で追加します。
$ cp /usr/lib/firewalld/services/ssh.xml /etc/firewalld/services/ssh-2200.xml
$ vim /etc/firewalld/services/ssh-2200.xml
#省略
<port protocol="tcp" port="2200"/>
追加したファイルを適用します。
適用する場合は、下記のコマンドよりfirewall-cmdで新しく追加します。
$ firewall-cmd --permanent --add-service=ssh-2200
$ firewall-cmd --reload
firewallを確認する
再度、firewallを確認すると新しい設定が追加されていることが確認できます。
$ firewall-cmd --list-all
public (active)
  target: default
  icmp-block-inversion: no
  interfaces: eth0
  sources:
  services: dhcpv6-client http https ssh-2200
  ports:
  protocols:
  masquerade: no
  forward-ports:
  source-ports:
  icmp-blocks:
  rich rules:
クライアントPCからSSH接続を試す
上記までに設定した内容を元にSSH接続します。
クライアントPCに戻り、sshで接続します。
コマンドで直接書いても良いのですが、今後のことを考えてconfigに設定値をかきます
$ touch ~/.ssh/config
$ vim ~/.ssh/config
configの設定値は下記です。
Host redmine
    HostName 123.11.22.33
    Port 2200
    ServerAliveInterval 60
    User admin
    IdentityFile ~/.ssh/id_rsa
これで、Hostに設定したredmineだけで、接続できるようになりました。
次のように接続する事が出来ます。
$ ssh redmine
以上です。
あとは、Redmineログイン後の設定、プラグインの導入や、メール送信設定をすれば使いやすくなります。
まとめてみると、意外とやる事が多いのでやはり敷居は高いと感じます。
しかし、チームと一緒にRedmineを改良していくのも醍醐味の一つですので、一度作ってみるのも良いでしょうか?

- 作者: 小川明彦,阪井誠
- 出版社/メーカー: 翔泳社
- 発売日: 2010/10/13
- メディア: 大型本
- 購入: 16人 クリック: 337回
- この商品を含むブログ (52件) を見る

- 作者: デビッド・アレン,田口元
- 出版社/メーカー: 二見書房
- 発売日: 2015/11/26
- メディア: 単行本
- この商品を含むブログ (6件) を見る